If you’re looking to give your bathroom an impressive and durable finish, epoxy bathroom flooring may be exactly what you need. Whether you’re a DIY enthusiast or hiring a professional, this guide outlines all the essential steps to successfully install epoxy bathroom flooring and achieve a beautiful and long-lasting result.
Key Takeaways
- Epoxy bathroom flooring is a sleek and durable option for any bathroom space.
- Proper preparation, choosing the right epoxy, and using the appropriate tools are critical to successful installation.
- Regular maintenance and cleaning are crucial for prolonging the lifespan of your epoxy bathroom floor.
- Common issues with epoxy bathroom floors can be resolved with troubleshooting solutions.
- An epoxy bathroom floor not only enhances the appearance of your bathroom but also adds value to your home.
Why Choose an Epoxy Bathroom Floor?
If you are considering renovating your bathroom, an epoxy floor should be at the top of your list. Epoxy flooring is a popular choice for bathrooms due to its many advantages and benefits. Here are some reasons why:
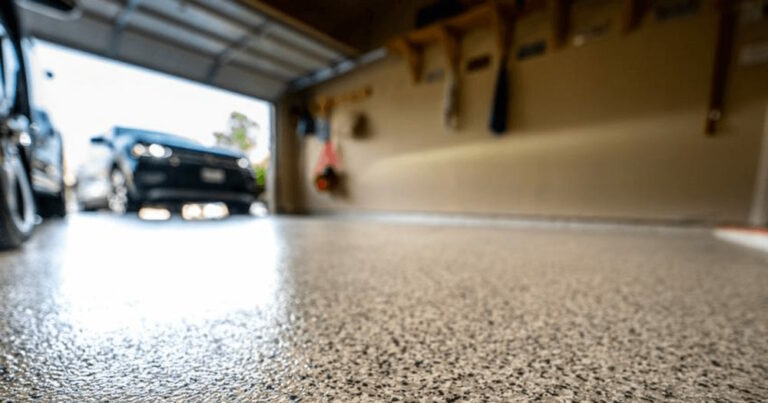
1. Sleek Appearance
An epoxy flooring gives your bathroom a seamless, smooth, and glossy finish that is both modern and stylish. This sleek appearance can instantly update the look of your bathroom, making it feel more contemporary and welcoming.
2. Durability
Epoxy flooring is extremely durable, as it is resistant to scratches, chips, and cracks. This makes it an ideal choice for high-traffic areas like bathrooms, where wear and tear from everyday use can quickly add up. With an epoxy floor, you can rest assured that it will maintain its quality and look great for years to come.
3. Waterproof Features
Another benefit of epoxy flooring is its waterproof features. Epoxy is a non-porous material that resists water and stains, making it perfect for areas like the bathroom that are exposed to moisture regularly. It is also effortless to clean and maintain, as spills and messes can be wiped away with ease.
Overall, choosing an epoxy bathroom floor offers numerous advantages and benefits, including a sleek appearance, durability, and waterproof features.
Preparing Your Bathroom for Epoxy Floor Installation
Installing an epoxy bathroom floor requires preparation beforehand to ensure the job is completed correctly. Below we will take a closer look at the essential steps involved in preparing your bathroom for the installation process.
Step 1: Clear the Room
Before starting any work, remove all items from the bathroom, including towels, mats, shower curtains, and bathmats. This will provide access to the entire floor area and prevent any unnecessary damage to your belongings.
Step 2: Remove Existing Flooring
If you have existing flooring, such as tile or vinyl, it needs to be removed before installing the epoxy bathroom floor. Use a floor scraper to strip the material away and clean any remaining adhesive or residue with a suitable cleaner.
Step 3: Inspect and Repair Any Damage
Thoroughly inspect your bathroom floor for any damage, such as cracks, gaps, or unevenness. Repair any issues using a suitable filler or patching compound and sand until smooth.
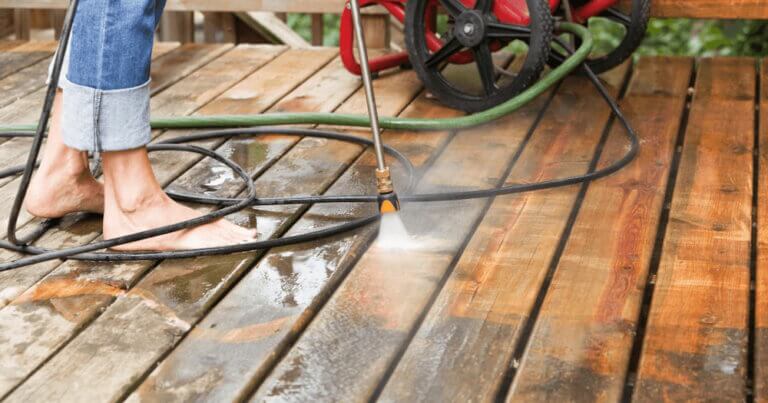
Step 4: Clean and Degrease the Surface
It is essential to clean and degrease your bathroom floor before applying the epoxy mixture. Use a suitable cleaner and a stiff-bristled brush to scrub the surface, ensuring to reach all areas of the floor adequately.
Step 5: Allow the Floor to Dry Completely
After cleaning, allow the bathroom floor to dry completely before proceeding to the next step. It may take up to 24 hours for the surface to dry thoroughly.
By following these essential steps, you can be sure that your bathroom floor is adequately prepared for the installation of your brand-new epoxy floor.
Choosing the Right Epoxy for Your Bathroom Floor
If you are looking to install an epoxy bathroom floor, it is crucial to select the right type of epoxy for the job. The two primary types of epoxy used for floors are water-based and solvent-based.
Water-Based Epoxy
Water-based epoxy is an eco-friendly option that is ideal for bathroom floors in residential and commercial settings. This type of epoxy is easy to apply, dries quickly, and has low odor levels. Moreover, water-based epoxy is suitable for use on concrete, wood, and tiles.
Tip: If you are working on a DIY project, water-based epoxy is the way to go. It is user-friendly and easy to handle.
Solvent-Based Epoxy
Solvent-based epoxy is a more durable option that is commonly used in industrial settings. It is resistant to moisture, chemicals, and abrasion, making it an ideal choice for high-traffic areas. However, solvent-based epoxy emits strong fumes during the installation process, and it requires a well-ventilated space. Additionally, solvent-based epoxy is only suitable for use on concrete surfaces.
Tip: If you are looking for a long-lasting solution or have a commercial bathroom that experiences heavy foot traffic, solvent-based epoxy is the better option.
Additionally, epoxy floors come in a variety of finishes, including gloss, semi-gloss, and matte. The finish you choose will depend on your preferences and the look you want to achieve for your bathroom.
Keep in mind: Some epoxies are self-leveling, while others require additional tools and techniques such as spreading or rolling. Before making a purchase, ensure that you understand the unique requirements of your chosen epoxy and have the necessary skills and tools to complete the installation process.
Tools and Materials Needed for Epoxy Bathroom Floor Installation
Before you get started on installing your new epoxy bathroom floor, it’s important to gather all the necessary tools and materials to ensure a smooth and successful installation process. Here’s a list of everything you’ll need:
| Tools | Purpose |
|---|---|
| Notched trowel | To apply epoxy to the floor |
| Paddle mixer | To mix the epoxy with hardener |
| Squeegee | To spread the epoxy evenly |
| Paint roller | To help smooth out and distribute the epoxy |
| Paintbrush | To touch up any missed spots or hard-to-reach areas |
| Measuring cups | To measure out the epoxy and hardener properly |
| Gloves | To protect your hands while working with chemicals |
| Safety glasses | To protect your eyes from splashes and spills |
Now, onto the materials you’ll need:
- Epoxy coating
- Epoxy hardener
- Cleaner/degreaser
- Painters’ tape
- Plastic sheeting or drop cloths
- Sandpaper (80-120 grit)
- Primer (if recommended by the epoxy manufacturer)
- Optional: decorative flakes or quartz
- Optional: urethane topcoat for added durability
Be sure to gather all the tools and materials before beginning the installation process to ensure a successful and efficient epoxy bathroom floor installation!
Step-by-Step Guide for Installing an Epoxy Bathroom Floor
If you’re ready to install an epoxy bathroom floor, follow this step-by-step guide for a smooth and successful process.
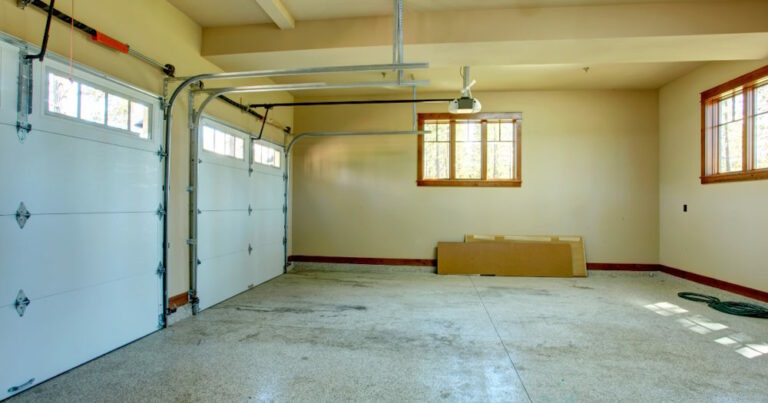
Step 1: Prepare the Floor
The first step in installing an epoxy bathroom floor is preparing the existing floor. Remove any debris or contaminants, and ensure the surface is clean and dry.
Step 2: Mix the Epoxy
Follow the manufacturer’s instructions to mix the epoxy resin and hardener thoroughly. Make sure to mix the correct proportions and use a clean container.
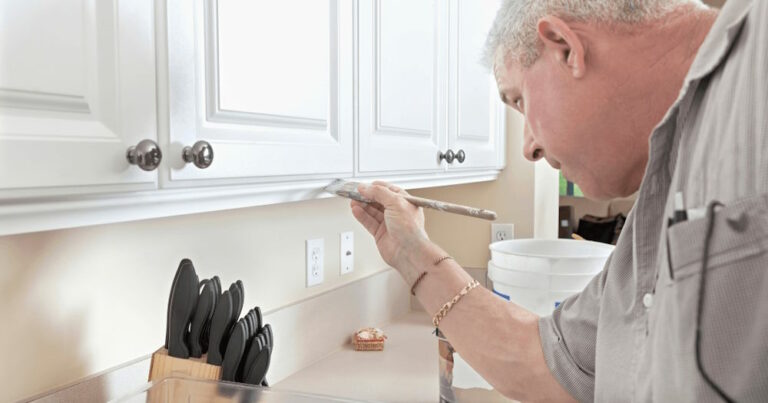
Step 3: Apply the Epoxy
Use an epoxy brush to apply the mixed epoxy to the bathroom floor, starting from one corner and working your way toward the opposite end. Spread the epoxy in thin, even coats, leaving no gaps or bumps.
Step 4: Add the Decorative Flakes (Optional)
If desired, sprinkle decorative flakes over the wet epoxy to add texture and color to the floor. Sprinkle the flakes evenly and allow the floor to dry completely.
Step 5: Apply the Top Coat
After the epoxy has dried, apply a top coat to seal and protect the floor. Allow the top coat to dry completely before walking on the floor.
By following these steps, you can install an epoxy bathroom floor that is durable, waterproof, and visually appealing.
Curing and Finishing Your Epoxy Bathroom Floor
Once the epoxy has been applied to your bathroom floor, it needs time to cure and set properly. This process typically takes anywhere from 24 to 72 hours, depending on the type of epoxy used and the thickness of the application. During this time, it’s essential to avoid walking on the floor or placing any objects on it to ensure that the epoxy cures evenly.
After the curing process is complete, you can begin finishing your bathroom floor to enhance its appearance further. Here are some finishing options you can consider:
- Adding color: If you opted for a clear or neutral-colored epoxy, you can add a color tint to create a more vibrant and personalized look.
- Adding texture: You can apply a non-slip additive to the final coat of epoxy to increase traction and reduce the risk of slipping.
- Adding a topcoat: Applying a topcoat of polyurethane or another sealant can add extra durability and protection to your bathroom floor.
Remember, the key to achieving a smooth and professional-looking finish is proper preparation and careful execution during the installation process. Take your time, follow the instructions carefully, and you’ll be rewarded with a stunning new bathroom floor.
Maintaining and Cleaning Your Epoxy Bathroom Floor
Congratulations! Your beautiful epoxy bathroom floor is now installed and ready to use. To ensure that your floor looks as good as new for years to come, proper maintenance and cleaning are essential. Follow these tips and guidelines to take care of your epoxy bathroom floor:
Regular Cleaning
To keep your epoxy bathroom floor clean, sweep regularly with a soft-bristled broom or dust mop.(SEO: cleaning epoxy bathroom floor) Use a gentle cleanser and warm water to remove any dirt or spills, and wipe dry with a microfiber cloth or chamois.(SEO: maintaining epoxy bathroom floor) Avoid using harsh chemicals or abrasive cleaners, as these can damage the surface of your floor.
If you prefer a natural cleaning solution, you can mix equal parts of white vinegar and water in a spray bottle(SEO: cleaning epoxy bathroom floor). Spray the solution on the floor and wipe with a clean mop. This mixture is effective at removing dirt and grime while leaving your floor with a streak-free shine.
Preventing Damage
To prevent scratches or damage to your epoxy bathroom floor, avoid dragging heavy objects or furniture across it.(SEO: maintaining epoxy bathroom floor) Instead, lift and carry items or use furniture pads on the bottom of furniture legs before placing them on the floor.
If your floor sustains any damage or scratches, repair it right away. The longer you wait to fix the damage, the more difficult it can be to repair.(SEO: maintaining epoxy bathroom floor)
Long-term Maintenance
One of the best things about epoxy bathroom floors is how easy they are to maintain over time. However, several long-term maintenance tasks can help keep your floor looking new for years to come.
| Maintenance Task | Timing/Frequency |
|---|---|
| Waxing | Every 6-12 months(SEO: maintaining epoxy bathroom floor) |
| Re-sealing | Every 2-3 years |
| Deep cleaning and re-coating | Every 5-6 years |
Waxing your floor every 6-12 months can help protect it from scratches and wear and tear. You can use a high-quality wax or polish specially designed for epoxy floors.(SEO: maintaining epoxy bathroom floor)
Re-sealing your floor every 2-3 years can help prevent water damage and other types of wear. A professional can apply a new coat of sealant quickly and efficiently.(SEO: maintaining epoxy bathroom floor)
Every 5-6 years, you may want to consider a deep cleaning and re-coating of your epoxy bathroom floor. A professional can strip away any buildup and re-apply a new coat of epoxy to refresh the look of your floor.(SEO: maintaining epoxy bathroom floor)
Troubleshooting Common Issues with Epoxy Bathroom Floors
Even with proper installation and maintenance, some common problems may occur with epoxy bathroom floors. Here are some troubleshooting steps to help you overcome these issues and keep your floor looking its best:
Problem: Bubbling
If you notice bubbles in your epoxy bathroom floor, it could be due to trapped air during installation or moisture beneath the surface. To fix this issue:
- Use a scraper to remove the bubbled area and sand lightly to create a smooth surface.
- Apply a new layer of epoxy on the cleaned surface and use a roller to remove any trapped air.
- Allow the epoxy to cure according to the manufacturer’s instructions.
Problem: Cracking
If your epoxy bathroom floor develops cracks over time, it could be due to heavy impact or temperature changes. To fix this issue:
- Use a scraper to remove any loose epoxy and sand the area lightly.
- Fill the cracks with an epoxy crack filler and smooth the surface with a putty knife.
- Allow the filler to cure and apply a layer of epoxy on top of the filled area, blending it with the surrounding surface.
- Allow the epoxy to cure completely.
Problem: Staining
If your epoxy bathroom floor becomes stained, it could be due to harsh cleaners or chemical spills. To fix this issue:
- Wash the stained area with a mild detergent and warm water.
- Use a scrub brush to remove any remaining stains.
- Rinse the surface with clean water and dry completely.
- Apply a new layer of epoxy to the stained area, ensuring a smooth and even surface.
- Allow the epoxy to cure completely.
By following these troubleshooting tips, you can fix common issues with your epoxy bathroom floor and keep it looking beautiful for years to come.
Conclusion
Transforming your bathroom with an epoxy floor is a fantastic way to add a touch of style and personality to your home. With its durable and waterproof features, an epoxy bathroom floor will last for years to come.
By following the step-by-step guide and preparing your bathroom correctly, you will be able to achieve the desired results. Remember to choose the appropriate type of epoxy for your bathroom floor and ensure you have the necessary tools and materials.
Once your epoxy bathroom floor is installed, maintaining it is as simple as regular cleaning and proper maintenance. Keep in mind the common issues you may encounter and how to troubleshoot them for a seamless and stunning result.
With these tips, you can confidently install an epoxy bathroom floor and enjoy your transformed space for years to come.
FAQ
Why should I choose an epoxy bathroom floor?
There are several benefits to choosing an epoxy bathroom floor. Epoxy floors have a sleek and modern appearance, they are highly durable and resistant to stains and damage, and they are waterproof, making them perfect for bathrooms.
How do I prepare my bathroom for epoxy floor installation?
Before installing an epoxy bathroom floor, you need to ensure that the surface is clean and free of any debris or contaminants. This may involve removing the existing flooring, patching any cracks or imperfections, and thoroughly cleaning the area.
What type of epoxy should I choose for my bathroom floor?
There are different types of epoxy available for bathroom floors, including water-based and solvent-based options. The choice depends on factors such as the level of moisture in your bathroom and the desired finish. It is recommended to consult with a professional to determine the best epoxy for your specific needs.
What tools and materials do I need for epoxy bathroom floor installation?
To install an epoxy bathroom floor, you will need tools such as a roller, paintbrushes, a mixing paddle, and a squeegee. Additionally, you will require epoxy resin, a hardener, and any necessary additives for color or texture. It is important to have all the necessary tools and materials ready before starting the installation process.
What is the step-by-step process for installing an epoxy bathroom floor?
The installation process for an epoxy bathroom floor involves steps such as preparing the epoxy mixture, applying it to the floor, spreading it evenly, and allowing it to cure. It is important to follow the manufacturer’s instructions and guidelines throughout the process to ensure a successful installation.
How do I maintain and clean my epoxy bathroom floor?
Maintaining and cleaning an epoxy bathroom floor is relatively easy. Regular sweeping or vacuuming to remove loose dirt and debris is recommended. Additionally, mopping the floor with a mild detergent or epoxy-specific cleaner will help maintain its shine and cleanliness. Avoid using harsh chemicals or abrasive cleaning tools that could damage the epoxy surface.
What are some common issues with epoxy bathroom floors and how can I troubleshoot them?
Common issues with epoxy bathroom floors include yellowing, bubbling, and chipping. Yellowing can be caused by exposure to sunlight or certain cleaning chemicals and can be remedied by applying a UV-resistant top coat. Bubbling may occur due to moisture during installation or inadequate surface preparation, and can be fixed by resolving the underlying cause and reapplying epoxy. Chipping can be addressed by patching and resealing the affected area.