Welcome to our comprehensive guide on house repainting! Repainting your home can give it a fresh look and protect it from the elements. However, it can be a daunting task if you don’t know where to start.
In this article, we’ll provide you with a step-by-step guide and expert tips to help you achieve a professional finish. Whether you’re looking to repaint the interior or exterior of your house, this guide has got you covered!
Key Takeaways:
- Repainting your house can improve its appearance and protect it from weather damage.
- Preparation is key to achieving a professional-looking result.
- Choosing the right paint and tools is crucial.
- Painting techniques are important to achieve even coverage and smooth transitions.
- Cleaning up and adding finishing touches can elevate the final result.
Understanding the Importance of House Repainting

In today’s world, your house is more than just a place to live. It’s a reflection of your personality and style. However, over time, weather conditions and other external factors can cause wear and tear, making your home look outdated and dull. This is where house repainting comes into play.
Repainting your entire house every few years can transform the appearance of your home and enhance its curb appeal. You will not only love coming home to a fresh-looking house, but you’ll also increase its value.
But the exterior paint job is not just about aesthetics. It also helps to protect your home against harsh weather conditions and prevent damage from water and pests. A fresh coat of paint acts as a barrier against the elements, keeping your home’s structure safe and secure.
In addition, repainting your house can be an opportunity to fix any underlying issues. As you prepare the surfaces, you can identify and address any signs of damage, such as cracks and holes. By doing so, you can prevent further damage and avoid costly repairs in the future.
Overall, house repainting is more than just a cosmetic process. It’s an investment in your home’s longevity, safety, and value.
Preparing Your House for Repainting
Before you start painting, it’s important to properly prepare your house for the best possible results. Here are the essential steps to follow:
- Inspect the surfaces: Take a close look at your house’s exterior and interior walls, trim, and ceilings. Check for any cracks, holes, or other damage that needs to be repaired before painting.
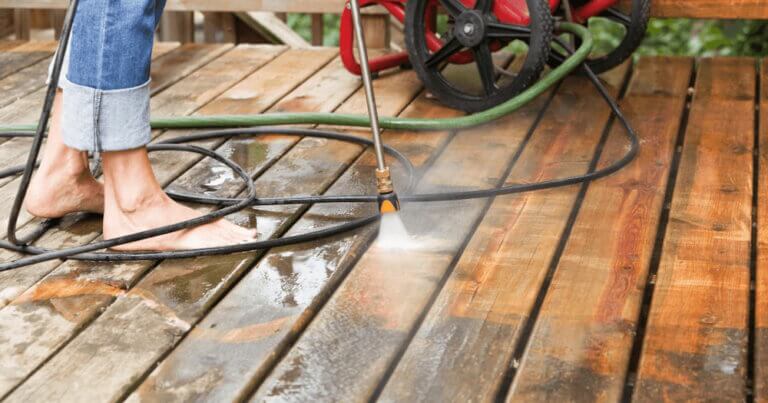
- Clean the surfaces: Cleaning the surfaces is essential for proper paint adherence. Use a pressure washer or a scrub brush and soap to remove dirt, grime, and any loose paint. Give the surfaces enough time to dry before proceeding to the next step.
- Scrape and sand: Remove any loose or peeling paint by scraping and sanding the surfaces. A paint scraper and sandpaper will do the job. If you’re dealing with lead-based paint, make sure to use the appropriate safety equipment and follow EPA guidelines.
- Repair any damage: Use wood filler or putty to repair any holes, cracks, or other damage to the surfaces.
- Prime the surfaces: Priming the surfaces is essential for achieving an even, professional-looking finish. Use a high-quality primer to cover any repaired areas, stains or discolorations.
- Protect the surrounding areas: Cover plants, windows, and other surfaces with masking tape, plastic sheeting, or drop cloths to prevent paint splatters and drips.
By following these steps, you’ll ensure that your house is ready for a flawless paint job.
Selecting the Right Paint and Tools

Choosing the correct paint and tools are essential for achieving a professional-looking finish. Here are some factors to consider when selecting paint:
- Type of Paint: There are several types of paint available, including oil-based and latex-based. Latex paint is usually the best choice for interior and exterior walls as it is durable, easy to clean, and dries quickly.
- Color: When selecting colors, keep in mind the lighting and overall aesthetic of your home. Consider testing out a small area first to see how the color looks in different lighting conditions.
- Finish: The finish of the paint can affect the overall appearance. Matte finishes are more forgiving but can be difficult to clean, while gloss finishes are more durable but highlight imperfections.
In terms of tools, here are the essentials you’ll need:
| Tool | Use |
| Paintbrushes | Use high-quality brushes for smooth application and to prevent brush marks. |
| Paint Roller | Use a roller with the appropriate nap length for the surface being painted. |
| Paint Tray | Use a sturdy paint tray that is wide enough to fit the roller. |
| Painter’s Tape | Use painter’s tape to mask off areas that don’t need to be painted. |
| Paint Sprayer | If you are painting a large surface area, consider using a paint sprayer for a smooth, even finish. |
By selecting the right paint and tools, you’ll be on your way to achieving a flawless finish.
Painting Techniques for a Flawless Finish
Painting your house can be a challenging task, especially when it comes to achieving a flawless finish. But with the right techniques, you can ensure your painting job looks professional and polished. Follow these painting tips to create a stunning, long-lasting finish:
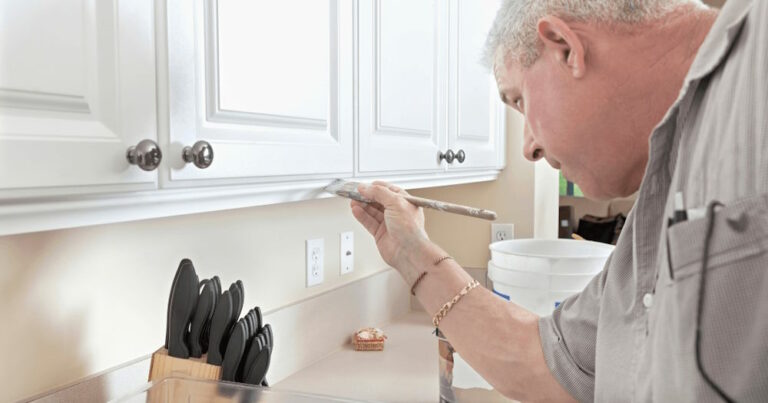
1. Use Proper Brush Strokes
When it comes to painting, using the right brush strokes is crucial for achieving a smooth and even finish. Begin by painting in long, sweeping strokes from top to bottom, then finish by lightly brushing over the surface in one direction to smooth out any brush lines. Remember to use the appropriate size brush for each area, such as a smaller brush for tight corners or edges.
2. Roll with the Right Technique
Rollers are an excellent tool for covering large surface areas quickly. For the best results, use a W pattern when rolling the paint onto the wall. Start by rolling upward, then diagonally, and then downwards to create a “W” shape. Be sure to apply even pressure throughout the motion to ensure complete coverage and a consistent finish.
3. Avoid Overloading the Brush or Roller
One common mistake when painting is overloading the brush or roller with too much paint, leading to drips and uneven coverage. Instead, use a paint tray or bucket and apply a moderate amount of paint to the brush or roller. This allows you to control the amount of paint applied and achieve a smoother finish.
4. Finish with a Top Coat
After you’ve applied the base coats and allowed them to dry completely, add a top coat to seal in the paint and create a professional-looking finish. A top coat can also improve durability and protect against scratches, chips, and fading. Remember to use the appropriate finish for your project, such as matte, eggshell, or gloss.
5. Clean Up Thoroughly
Once you’ve finished painting, it’s time to clean up. Start by wiping any excess paint from brushes and rollers with a cloth or paper towel. Then, wash them thoroughly with warm water and mild soap to remove any remaining paint. Be sure to also clean up any spills or splatters on surfaces, floors, and surrounding areas.
By following these painting techniques, you can achieve a professional-looking finish that will enhance the appearance and value of your home.
Tips for Exterior House Repainting
Repainting the exterior of your house can be a daunting task, but with the right tools and techniques, you can achieve a beautiful and long-lasting finish. Here are some expert tips to help you with your exterior house repainting project:
Choose the Right Exterior Paint
When it comes to exterior painting, it’s essential to choose a paint that is specifically designed for outdoor use. Look for paint that is water-resistant, durable, and can withstand harsh weather conditions. Also, consider the climate in your area and choose a paint that can resist fading and chalking.
Repair Any Damage
Before you start painting, it’s important to check your house’s exterior for any damage. Look for cracks, holes, or any other damage that could affect your paint’s adhesion. Repair any damage with a suitable filler and let it dry completely before painting.
Clean and Prep the Surface
Proper cleaning and preparation are crucial for a smooth and even paint finish. Remove any dirt, grime, or old peeling paint with a pressure washer or a wire brush. Use a cleaning solution to get rid of any stubborn stains. Let the surface dry completely before painting.
Use High-Quality Painting Tools
Invest in high-quality painting tools for a professional-looking finish. Choose brushes and rollers that are suitable for the type of paint you are using and the surface you are painting. Don’t skimp on the paint; using high-quality paint will also make a significant difference in the finished product.
Protect Surrounding Areas
Don’t forget to protect any areas surrounding your house that you don’t want to get paint on. Cover plants, windows, and any other surfaces with plastic sheeting or drop cloths. This will also save you time and effort cleaning up after you finish painting.
Consider Hiring a Professional
While exterior house repainting is doable for the DIY crowd, it’s not always an easy task. If you don’t have the experience or skillset to complete the job, consider hiring a professional painter. They can provide you with an expert finish, and you won’t have to worry about any potential mishaps.
With these tips, you can tackle your exterior house repainting project with confidence. Remember to take your time, be patient, and enjoy the process. Your home will look fresh, new, and inviting in no time!
Finishing Touches and Cleanup
After completing the painting process, it’s time for the finishing touches. Follow these tips to add final accents and ensure a polished look for your newly painted house.
1. Add Trim or Accent Colors
Consider adding trim around windows and doors or accent colors to make certain features of your home stand out. This is an opportunity to get creative and personalize your home’s appearance.
Expert Tip: To help accentuate the newly painted areas, consider painting the trim and accents with a different sheen or gloss level than the main color.
2. Clean Up
Once you’re done painting, it’s important to properly clean the painting tools and surfaces. Failing to do so can lead to damage to your tools and surfaces, as well as lead to less than desirable results on future paint jobs.
| Tools to Clean | Cleaning Method |
| Paint Brushes | For latex paint, use warm soapy water to clean brushes. Rinse with clean water and dry with a clean cloth. For oil-based paint, use a solvent like mineral spirits to clean brushes. |
| Rollers | For latex paint, rinse with warm soapy water until the water runs clear. For oil-based paint, use a solvent like mineral spirits to clean rollers. |
| Paint Tray | Scrape off any excess paint and rinse the tray with warm soapy water until it’s clean. |
| Drop Cloths | Shake any excess paint off outdoors and then machine or hand wash with warm water and detergent. |
Make sure to check the manufacturer’s instructions for cleaning products to use with your particular type of paint.
Expert Tip: To avoid paint from drying on your brushes and rollers during breaks or overnight, wrap them in plastic wrap or aluminum foil.
By following these tips, you can ensure that your house repainting project is a success from start to finish – and enjoy your newly painted home for years to come!
Conclusion
Repainting your house may seem like a daunting task, but it can be a gratifying project that enhances the beauty and value of your home. By following a step-by-step guide, you can achieve a professional finish and enjoy your vibrant new home for years to come.
Our local painters at Canyon Painting have all the skills and knowledge about how to make your home more appealing. With decades of experience, we are here to help you achieve your dream home painting experience!
Call us today for an appointment.