Are you planning to give your house a fresh and vibrant look with a new coat of paint? Before you get started, it’s crucial to properly prep your home’s exterior to ensure a flawless finish that will stand the test of time.
In this comprehensive guide, you will learn everything you need to know about how to prep a house for painting exterior projects, including step-by-step instructions and expert tips.
By following these guidelines, you can achieve a professional-looking exterior paint job that will enhance the overall appearance of your home and increase its curb appeal for years to come. From assessing the condition of your exterior to choosing the right paint and tools and applying proper painting techniques, this guide covers everything you need to know to succeed.
Key Takeaways
- Properly prepping your house’s exterior is essential for achieving a flawless and long-lasting paint job.
- Assess the condition of your exterior and address any underlying issues beforehand.
- Clean and prep the surface properly to ensure paint adhesion and achieve an even finish.
- Repair any damages and patch up any imperfections to achieve a professional-looking paint job.
- Choose the right paint and tools, prime the surface, and apply proper painting techniques to achieve a beautiful and long-lasting finish.
Assessing the Condition of Your Exterior

Before starting your exterior painting project, it’s essential to assess the condition of your house. Your home may need minor or significant repairs that need to be addressed before painting. Ignoring these underlying issues can lead to paint failure and further damage. Here are some crucial steps to follow when assessing your home:
Inspecting for Damage
Walk around your house and look for any damages, such as cracks, holes, dents, or rotting wood. Write down all the areas that need repairs and prioritize the most critical issues. Check for any structural problems that may need professional assistance.
Checking the Weather Resistance
Examine how your house’s exterior handles the elements. Check the gutters, downspouts, and drainage systems for any clogs, leaks, or damage. Make sure the exterior walls, windows, and doors are water-resistant, and no moisture is penetrating inside your home.
Determining the Surface Condition
Assess the texture and consistency of your house’s exterior surface. Touch the walls and feel for any loose or flaky paint, rough surfaces, or glossy areas. These can impact how the new paint will adhere and appear on your house.
Considering the Material
Each exterior painting project varies, depending on your house’s material, such as bare wood, brick, stucco, or concrete. Different materials require specific preparation and painting methods, so you need to determine what’s suitable for your home.
Taking the time to assess your house’s exterior condition allows you to plan and execute the best painting strategy. Proper preparation and painting will not only improve your home’s curb appeal, but it will keep it in top condition for years to come.
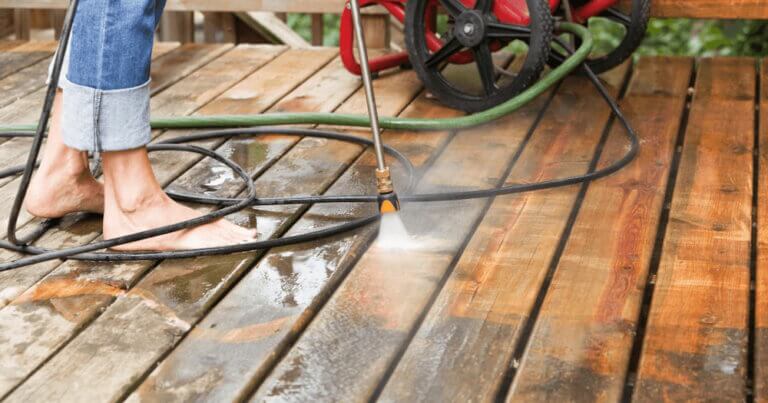
Cleaning and Prepping the Surface
Before you can start painting, the surface of your house needs to be clean and properly prepped. This step is critical in ensuring your new paint adheres well and lasts longer. Follow these steps to clean and prepare your exterior surface:
Tools and materials:
- Pressure washer
- Hose
- Bucket
- Detergent or trisodium phosphate (TSP)
- Wire brush
- Sandpaper
- Caulk
- Putty knife
Step-by-step guide:
- Start by removing any loose or flaking paint using a wire brush or scraper. Be sure to wear protective gear, such as gloves and goggles, to avoid injury.
- Next, use a pressure washer or hose to wash away dirt, dust, and grime from the surface. If your house has mold or mildew, use a solution of detergent or TSP and water to scrub the affected area. Rinse thoroughly with water and let dry completely.
- Inspect the surface for any cracks, gaps, or holes. Use caulk to fill gaps or holes and let dry completely. Scrape away any excess caulk with a putty knife and sand the surface until smooth.
- Use sandpaper to smooth any rough areas and remove any remaining loose or flaking paint.
- Finally, make sure the surface is completely dry before painting. This is critical to avoid any moisture being trapped under the new paint, which can cause it to peel or bubble.
By properly cleaning and paint prep the surface, you’ll create an ideal base that helps paint stick properly and ensure a more durable and attractive finish.
Repairing and Patching
Before starting the painting process, it’s crucial to repair and patch any damages, cracks, or imperfections on your house’s exterior. This ensures a smooth and even surface for the paint to adhere to, resulting in a professional-looking finish. In this section, we’ll guide you through the process of repairing your house’s exterior, including patching walls and fixing cracks.
Assess the Damage:
The first step in repairing your exterior is assessing the damage. Walk around your house and look for cracks, holes, and other imperfections that need to be addressed. Make a list of the areas that require repair before you start.
Prepare the Surface:
Preparation is key to achieving a smooth and even surface. You need to remove any loose or old paint, weathered wood, dirt, and debris from the areas that need repair. Use a wire brush, scraper, or sandpaper to remove any loose paint. Clean the surface with a power washer or a hose to remove any dirt and debris.
Fill Cracks and Holes:
Once the surface is clean and dry, you can start filling the cracks and holes. For small cracks, use a high-quality caulk or silicone and apply it with a caulking gun. For larger cracks and holes, use a patching compound. Apply the patching compound with a putty knife and let it dry completely. Sand the surface until it’s smooth.
| Type of Crack/Hole | Patching Method |
| Narrow Cracks | High-quality caulk or silicone |
| Wide Cracks and Holes | Patching compound |
Prime the Repaired Areas:
After the repaired areas are completely dry, you need to prime them before painting. Priming helps to seal the surface and create an even base for the topcoat. Apply a coat of primer to the repaired areas and let it dry completely. Once the primer is dry, you can start painting your house’s exterior.
By taking the time to properly repair and patch your house’s exterior, you’ll achieve a flawless and professional-looking finish that will enhance the overall appearance of your home and a good paint job.
Protecting Surrounding Areas
Painting the exterior of your house can be a messy process, but taking the time to protect the surrounding areas can save you a lot of trouble and extra cleanup. In this section, we’ll guide you through the best practices for protecting your surroundings during an exterior painting project.
1. Cover Furniture and Plants
Before you start painting, move any outdoor furniture and potted plants away from the house or cover them with plastic or a drop cloth. This will protect them from any paint splatters or accidental spills.
2. Use Masking Tape
Apply masking tape to the edges of windows, doors, and any other areas that you want to keep paint-free. This will help prevent any accidental smudging or overlapping onto other surfaces, creating a neater and more professional-looking finish. Be sure to remove the tape before the paint is completely dry to prevent peeling paint.
| Tip: | Use a putty knife or painter’s tool to create a straight edge along the masking tape for a more precise line. |
3. Protect the Ground
Cover the ground around the house with a drop cloth or plastic sheeting to protect it from paint drips and spills. This is particularly important if you’re painting on a windy day or with a spray gun. You don’t want any paint to stain or damage your driveway, patio, or lawn.
Tip: If you’re painting a multi-story house, make sure to use scaffolding or a sturdy ladder to access higher areas. Safety first!
By taking these simple precautions, you can protect your surroundings from any accidental damage and ensure a clean and successful painting project.
Choosing the Right Paint and Tools
When it comes to selecting paint and tools for your exterior painting project, it’s essential to choose high-quality materials that will not only look great but also stand the test of time. Here are some things to consider:
Choosing the Right Paint
Choosing the right paint is crucial for achieving a professional-looking finish that will last. Factors to consider include:
- The type of paint you use, whether it’s oil paint, latex paint or water-based
- The color and sheen you want to achieve
- The quality of the paint, as well as its durability and resistance to fading and weathering
- The paint’s coverage and thickness, which will determine how much you need to buy and how many coats you’ll need to apply
Selecting the Right Tools
Having the right tools for your painting project is essential for achieving the best possible results. Some essential tools you’ll need include:
- Paintbrushes in a variety of sizes and widths
- Rollers and roller covers, which are great for covering large areas quickly
- A paint sprayer, which can be an efficient and time-saving tool for larger projects
- Drop cloths and tarps to protect surfaces and furniture from paint splatters
- Masking tape and painter’s tape to protect trim and other areas you don’t want to paint
- A paint scraper and wire brush to remove existing paint and prep the surface
Exterior Painting Supplies
In addition to paint and tools, there are a few other supplies you’ll need for your exterior painting project, such as:
- Sandpaper in different grits for smoothing out rough or uneven surfaces
- A primer to help the paint adhere better to the surface and ensure a more even finish
- A paint tray or bucket to hold the paint
- A stirring stick to mix the paint thoroughly before use
- A high-quality, durable paintbrush and/or roller cover, which can make all the difference in achieving a smooth and even finish
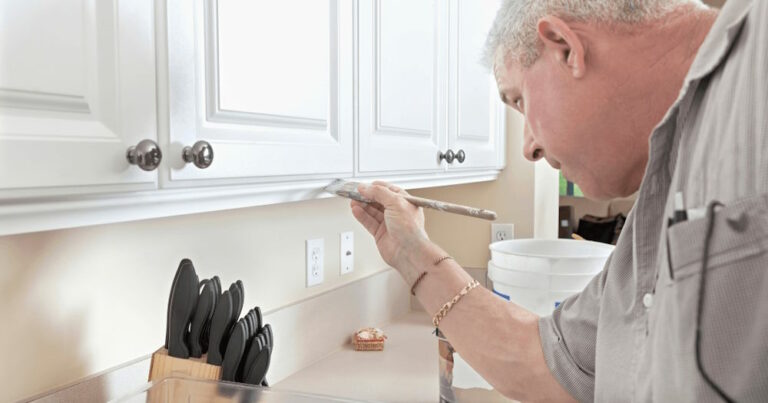
Priming the Surface
Priming your exterior before painting is a crucial step that should never be overlooked. Skipping this step can lead to an uneven finish, poor adhesion, and premature peeling.
Priming helps the paint adhere better to the surface, seals the porous areas, and provides a uniform base for the topcoat to lay on.
Before priming, make sure the surface is clean, dry, and free of any debris. Use a high-quality primer and apply it evenly using a brush or a roller. Follow the manufacturer’s instructions for drying time before applying the paint.
When priming, pay special attention to the areas that were repaired or patched. These areas may have different porosity than the rest of the surface, and proper priming will help achieve a uniform finish.
Importance of Priming
The purpose of a primer is to prepare a surface for maximum adhesion of the coating system. Primers are specially formulated paints that bond tenaciously to the substrate, provide an ideal base for subsequent coats of paint, and extend the life of the finish.
– Sherwin-Williams
Painting Techniques and Tips
Painting the exterior of your house can be a daunting task, but with the right techniques and tips, you can achieve a flawless finish that will make your home the envy of the neighborhood. Here are some essential exterior painting techniques and tips to help you get started:
Start with a Clean Surface
Before you start painting, ensure that your house’s exterior is clean and free of any dirt, grime, or loose paint. Make sure to do pressure washing or a scrub brush to clean the surface thoroughly, especially for previously painted surfaces. For areas with stubborn stains, use a solution of water and a mild detergent. Let the surface dry completely before you start painting.
Choose the Right Paint and Tools
Choosing the right paint and tools is critical to achieving a professional-looking finish. Use high-quality paint that is specifically designed for the exterior of your house, and select a paint color that complements your home’s architectural style. Invest in good-quality brushes and rollers, and use a paint sprayer if you have a larger surface area to cover.
Apply the Paint Correctly
When applying the paint, use long, even strokes, and work in small sections at a time. Always start at the top of the wall and work your way down. Use a brush to paint corners and edges, and a roller for larger surface areas. Ensure that you apply the paint evenly and avoid leaving drips or streaks.
Use Painting Techniques to Achieve a Flawless Finish
One of the most common mistakes people make when painting the exterior of their house is not using the right techniques. Here are some useful tips to help you achieve a flawless finish:
- Use a technique called “feathering” to blend in the edges of your paint strokes, making them less noticeable.
- Use a technique called “cutting in” to paint corners and edges with precision. Use a small brush to paint a straight line along the edge, then fill in the rest of the area with a roller.
- Paint in the shade to avoid the sun drying the paint too quickly, which can cause lap marks.
- Paint narrow surfaces, such as trim or shutters, with a small brush to avoid drips.
Finishing Touches
Once you have finished painting, take a step back and admire your work. To achieve a flawless finish, ensure that you let the paint dry completely before applying a second coat. Use a high-quality paintbrush to touch up any missed spots or areas that need more attention. Remove any tape or coverings carefully to avoid smudging the paint.
By using these exterior painting techniques and tips, you can achieve a flawless finish that will enhance the appearance and value of your home for years to come.
Drying and Finishing Touches
After completing the painting process, it’s essential to allow sufficient drying time before applying any finishing touches. The drying time of exterior paint depends on several factors, including the type of paint, weather conditions, and the surface’s porosity. In general, most exterior paints require 24-48 hours before they are touch-dry. However, it’s essential to follow the manufacturer’s instructions for specific drying times.
Once the paint is dry, you can remove any masking tape or protective covers that you used during the painting process. Carefully peel away the tape to avoid smudging or damaging the paint.
If you notice any areas that need additional touch-ups, use a small brush to carefully apply the paint and blend it with the surrounding area.
Outdoor furniture, plants, and other decorative elements can now be returned to their original position.
It’s important to note that while the paint may be touch-dry, it may take several weeks for the exterior paint to cure fully. During this time, avoid touching or scrubbing the newly painted surface. Also, avoid hanging decorative elements, such as wind chimes, until the paint is completely cured.
By allowing sufficient drying time and taking care during the finishing touches, you can ensure a beautiful and long-lasting paint job.
Conclusion

Prepping your house for painting exterior is a crucial step to achieve a flawless and long-lasting finish. By following this ultimate guide, you now have the knowledge and confidence to tackle your painting project like a pro. Remember to assess the condition of your exterior, clean and prep the surface, repair and patch any damages, protect the surrounding areas, choose the right materials, prime, apply proper techniques, and finish with care.
With these steps, your house will have a fresh and vibrant exterior that will enhance its curb appeal for years to come. Don’t rush the process, take your time, and enjoy creating your own DIY masterpiece. By properly prepping your house for painting the exterior, you will save time, money, and frustration in the long run. Happy painting!
FAQ
How do I assess the condition of my exterior before starting an exterior painting project?
Before starting any painting project, it’s important to assess the current condition of your exterior. Inspect your house for any damages, cracks, or underlying issues that may need to be addressed before painting.
How do I clean and prep the surface before painting?
To achieve a smooth and even surface for painting, it’s essential to clean your house’s exterior, remove dirt, mold, and loose paint. Follow the detailed instructions in the cleaning and prepping section to prepare the surface properly.
What should I do to repair and patch any damaged areas on my house’s exterior?
Repairing any damaged areas and patching up imperfections is crucial for a flawless finish. Learn how to repair cracks, fill holes, and address surface irregularities in the repairing and patching section of this guide.
How can I protect the surrounding areas from accidental paint splatters?
Painting can be messy, so it’s important to protect surrounding areas. Get tips on covering furniture, plants, windows, and other elements near your house that need protection in the section about protecting surrounding areas.
What should I consider when choosing paint and tools for an exterior painting project?
Choosing the right paint type, color, sheen, and tools is crucial for a successful paint job. The section on choosing the right paint and tools will guide you through the selection process.
Why is priming the surface important before painting?
Priming the surface enhances paint adhesion, seals porous surfaces, and provides an even base for the topcoat. Learn about the importance of priming and how to properly prime your house’s exterior in the priming section.
What are some painting techniques and tips I should know?
This guide provides expert tips and techniques for achieving a flawless finish. Learn about brush and roller techniques, achieving clean lines, and other helpful tricks in the painting techniques and tips section.
What should I do after completing the painting process?
After painting, allow sufficient drying time and apply any necessary finishing touches. Learn how to properly care for your newly painted exterior in the drying and finishing touches section.
How do I ensure a long-lasting and beautiful paint job?
By following the step-by-step instructions in this guide and taking proper care during the painting process, you can achieve a beautiful and long-lasting paint job.