Tips to Make Your Painting Project Go Smoothly: Expert Preparation Guide

A successful painting project doesn’t begin when the painter arrives it starts with proper preparation. Whether you’re refreshing a single room or transforming your entire home, understanding what steps to take beforehand can save time, reduce costs, and ensure professional-quality results. While experienced painters like Canyon Painting, serving Cottonwood and the Verde Valley, are experts in both commercial and residential painting, there are several preparatory tasks homeowners can handle themselves to maximize efficiency and value. These professional tips for home painting will help ensure your project runs smoothly from start to finish.

Understanding the Pre-Painting Preparation Process

Before professional painters arrive at your property, it’s essential to remember a fundamental principle: you’re paying them for their specialized painting skills, not for moving furniture or cleaning surfaces. By handling certain preparatory tasks yourself, you’ll reduce labor hours and potentially save hundreds of dollars while allowing the painters to focus on what they do best—delivering a flawless finish.

The key to a smooth painting project lies in proper planning and preparation. When you take care of basic setup tasks before the painters arrive, you create an efficient workflow that benefits everyone involved. This preparation phase typically takes homeowners 2-4 hours for an average-sized room but can reduce professional labor time by the same amount or more.

Essential Pre-Painting Tasks Every Homeowner Should Complete

Clean Your Walls Thoroughly

One of the most overlooked yet critical steps in painting preparation is wall cleaning. You might wonder why cleaning matters if fresh paint will cover everything anyway. The answer lies in how paint interacts with surface contaminants. Paint doesn’t hide dirt and dust—it actually makes these imperfections more visible by permanently adhering them to the wall surface.

When paint dries over dust particles, grease spots, or cobwebs, it creates a textured, uneven appearance that compromises the final finish. Professional painters know that a clean surface ensures proper paint adhesion and a smooth, uniform appearance that will last for years.

The proper wall cleaning process:

  • Mix a solution of warm water with a mild detergent (avoid harsh chemicals that might damage existing paint)
  • Use a soft sponge or microfiber cloth to gently wipe down all surfaces
  • Focus on high-traffic areas, around light switches, and near doorways where oils from hands accumulate
  • Avoid soaking the walls—use a damp, not wet, cleaning method
  • Allow walls to dry completely (typically 24 hours) before painting begins
  • Pay special attention to kitchens and bathrooms where grease and moisture create more buildup

Designate a Staging Area for Painting Supplies

Professional painters arrive with an extensive array of equipment: paint cans, rollers, brushes, drop cloths, ladders, mixing tools, and safety equipment. A staging area serves as the operational hub for your painting project, allowing painters to work efficiently without constantly searching for tools or materials.

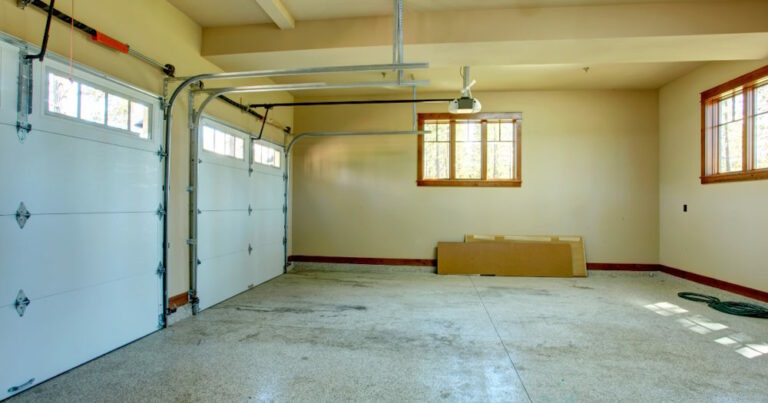
The ideal staging area should be a garage, basement, or spare room with adequate space (at least 100 square feet for most projects). This area should have easy access to the rooms being painted and preferably a hard floor surface that’s easy to clean. If weather permits and you’re having exterior work done, a covered porch or carport can also serve this purpose.

By preparing this space in advance, you demonstrate respect for the painters’ workflow and help them maintain an organized, efficient operation throughout the project.

image 9

Things to Know: Key Facts About Painting Project Preparation

  • Preparation typically accounts for 70% of painting project time – Professional results depend more on prep work than the actual painting
  • Self-preparation can reduce project costs by 15-25% – Handling basic prep tasks yourself decreases billable labor hours
  • Paint adheres 40% better to clean surfaces – Proper cleaning significantly improves paint longevity and appearance
  • Moving furniture yourself can save 2-4 hours of labor – This translates to $100-400 in potential savings depending on your market
  • Outlet covers removed before painting prevent 90% of accidental paint damage – This simple step protects valuable fixtures
  • Walls need 24 hours to dry after cleaning – Painting on damp surfaces leads to poor adhesion and potential mold growth
  • Professional painters work 30% faster in properly prepared spaces – Good preparation creates an efficient workflow
  • Most interior repainting is needed every 5-7 years – Learn more about how often should you repaint the interior of your home to plan accordingly

Moving and Protecting Your Furniture

While professional painters will cover furniture with protective plastic sheeting, they shouldn’t be expected to move heavy items or rearrange your room. Furniture positioning is a critical preparatory step that homeowners should handle before the painters arrive.

For rooms being painted, move all furniture to the center of the room or, ideally, to another room entirely. Small and medium-sized pieces should be relocated completely. Larger items like beds or entertainment centers can be moved to the room’s center and covered. This approach provides painters with clear access to all walls and prevents accidental damage to your belongings.

Furniture protection checklist:

  • Remove all wall decorations, including pictures, mirrors, and shelving
  • Clear furniture surfaces of lamps, electronics, and decorative items
  • Move small to medium furniture pieces out of the room completely
  • Push large furniture to the room’s center, at least three feet from walls
  • Remove or secure window treatments that could get paint splattered
  • Store valuable or fragile items in a safe location away from the work area

Remember, even though painters will use drop cloths and protective coverings, accidents can happen. The more you do to protect your belongings beforehand, the less risk you’ll face.

Special Considerations for Different Room Types

Different rooms require different preparation approaches. Kitchens may need cabinet contents temporarily relocated. Bathrooms require removal of toiletries and shower curtains. Bedrooms benefit from complete furniture removal when possible. For more comprehensive guidance on preparing different spaces, explore additional painting blogs with room-specific advice.

Removing Outlet Covers and Switch Plates

This simple task takes only 15-30 minutes but can save you significant frustration later. Electrical outlet covers and switch plates are typically made of plastic or metal, and once paint dries on them, removal becomes challenging without damaging the fixture or the paint itself.

Many homeowners invest in decorative, expensive, or vintage electrical covers that complement their home’s aesthetic. These are especially vulnerable to paint damage. Even standard covers benefit from removal, as it allows painters to achieve crisp, clean edges around electrical boxes.

Step-by-step removal process:

  • Turn off power to the room at the circuit breaker for safety (optional but recommended)
  • Use a flathead screwdriver to remove the single screw holding each cover plate
  • Place all screws in a labeled plastic bag or container (note which room they came from)
  • Store cover plates safely, organized by room for easy reinstallation
  • If covers are painted over from previous jobs, consider this an opportunity to replace them with new ones
  • Photograph complex switch configurations (like multi-gang boxes) before removal for easy reinstallation reference

After painting is complete and surfaces are dry, reinstalling these covers is straightforward and gives your newly painted room a polished, professional appearance.

Communication and Timing Considerations

Clear communication with your painting contractor ensures everyone has aligned expectations. Discuss the scope of your preparation work beforehand so the painters know what to expect when they arrive. Confirm the start time and date, and make sure all preparation work is completed at least one day before the scheduled start.

If you’re working with a full service painter, ask which preparatory tasks they include in their service package and which they expect you to handle. Some companies offer tiered service levels where they handle more or less preparation depending on your budget.

Creating a Preparation Timeline

For optimal results, follow this preparation timeline:

  • One week before: Finalize color choices, purchase or confirm paint delivery, begin removing wall decorations
  • 3-4 days before: Move furniture, clean walls, remove outlet covers
  • 1-2 days before: Allow cleaned walls to dry completely, do a final walkthrough
  • Day before: Set up staging area, confirm painter arrival time, secure pets and children’s schedules

image 10

Additional Pro Tips for a Seamless Painting Experience

Beyond the essential preparation steps, consider these additional tips that professional painters recommend:

  • Secure pets and children: Arrange for pets to stay elsewhere during painting, and plan children’s schedules to minimize disruption
  • Protect flooring: While painters will use drop cloths, consider additional protection for expensive hardwood or tile
  • Ensure adequate ventilation: Open windows when possible and have fans available to improve air circulation
  • Mark problem areas: Use painter’s tape to mark walls with cracks, holes, or other issues that need special attention
  • Discuss paint storage: Confirm where leftover paint will be stored for future touch-ups
  • Plan for multiple coats: Understand that quality painting often requires 2-3 coats and plan your schedule accordingly
  • Weather considerations: For exterior painting, check the forecast and be prepared to reschedule if necessary

What to Expect During the Painting Process

Once your preparation is complete and painters arrive, they’ll typically follow this workflow: final surface inspection, any necessary repairs or caulking, primer application (if needed), first coat, drying time, second coat, and final inspection. Your thorough preparation means they can move directly into their specialized work without delays.

Most professional painters work efficiently and clean up their workspace daily. However, expect some disruption to your normal routine, especially regarding room access and ventilation needs. Drying times vary based on humidity, temperature, and the type of paint used—typically 4-6 hours between coats for latex paint, longer for oil-based products.

Frequently Asked Questions

How much money can I save by doing prep work myself?

You can typically save 15-25% on total project costs by handling preparation work yourself. For an average room costing $400-600 to paint professionally, self-preparation could save $60-150. Larger projects yield proportionally greater savings. The exact amount depends on your local labor rates and the extent of preparation needed, but most homeowners save 2-4 hours of billable labor time per room by cleaning walls, moving furniture, and removing fixtures themselves.

How long does proper wall cleaning take?

Plan for 30-45 minutes per average-sized room (12×12 feet) for thorough wall cleaning. Larger rooms or rooms with extensive dirt, grease, or smoke residue may take up to an hour. Kitchens typically require the most cleaning time due to grease accumulation, while bedrooms are usually quickest. The time investment is worthwhile—clean walls ensure better paint adhesion and a more professional-looking finish that lasts longer.

Do I need to remove everything from the walls?

Yes, remove all wall hangings, nails, picture hooks, and decorative items before painters arrive. This includes artwork, mirrors, shelving, clocks, and wall-mounted electronics. Leaving items on walls forces painters to work around them, which increases labor time and creates an uneven finish. Take this opportunity to patch any holes from removed fixtures—your painter can sand these smooth before painting begins.

Should I clean walls if they’re getting a dark color over light paint?

Yes, always clean walls regardless of the color change. While darker colors may hide some imperfections better than light colors, dirt and dust still interfere with paint adhesion. Surface contaminants prevent proper bonding between the new paint and the existing surface, leading to premature peeling, flaking, or an uneven texture. Clean walls are essential for durability and professional results with any color choice.

What if I can’t move heavy furniture myself?

Discuss furniture moving with your painter beforehand—many offer this service for an additional fee. Alternatively, hire professional movers for just the heavy items, or ask friends and family for help. At minimum, move everything you reasonably can and push heavy pieces to the room’s center, at least three feet from walls. The more you can move yourself, the more you’ll save on labor costs. Some painting companies partner with moving services to offer package deals.

How far in advance should I complete preparation work?

Complete all preparation work 1-2 days before the painters’ scheduled arrival. This timeline allows cleaned walls to dry completely (24 hours is ideal) and gives you time to address any issues you discover during preparation. Don’t prepare too far in advance—leaving rooms dismantled for extended periods creates unnecessary disruption to your household. Confirm the exact start date with your painter a few days beforehand to ensure your timing aligns perfectly.

Facebook
Twitter
LinkedIn
WhatsApp

Thinking about your next project?

Schedule your free quote.